What is a binding foot for in sewing machines?
By Lucas Hayes
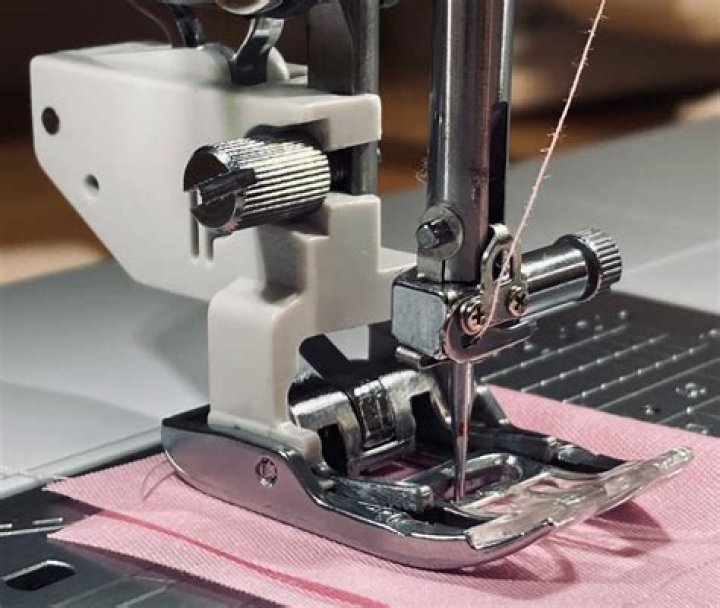
What is a binding foot for in sewing machines?
This optional presser foot is equipped with a small funnel to fold and guide the binding over the fabric edge before it reaches the sewing machine needle. It can be used with either a narrow zigzag or a straight stitch, and will handle from 10mm to 14mm bias tape.
What is the difference between bias tape and binding?
Now that you’re an expert on the differences between tape, facing, and binding, we’ll cover some tips and tricks for getting a great finish. This is because while bias facing turns the seam allowance inward, bias binding simply wraps around the raw edge.
Do I need bias tape?
Bias tape is perfect for a decorative finish on a curved edge because the bias will bend and ease around the curve. A straight-grain strip will not curve without kinks and warping. Bias is used in many quilting techniques and sewing projects.
How do you make fabric bias tape?
How to Make Bias Tape Binding
- Step 1 – Find the Bias. First find the bias of the fabric.
- Step 2 – Cut Strips. Cut strips along the 45-degree bias double the width of your bias maker.
- Step 3 – Join the Strips. Take 2 strips that have ends pointing in the same direction.
- Step 4 – Press Open and Trim Seams.
Can you use ribbon as bias tape?
Using commercially available ribbon is an alternative to using bias tape or manually cut straight- or bias-cut binding strips. More importantly, it can be more convenient to use as it is pre-cut and unrolls from a spool. Ribbon also adds a distinctive contrast depending on the project.
What is the point of bias tape?
Bias tape is used in making piping, binding seams, finishing raw edges, etc. It is often used on the edges of quilts, placemats, and bibs, around armhole and neckline edges instead of a facing, and as a simple strap or tie for casual bags or clothing.
How do you make homemade bias tape?
How to Make Bias Tape Binding
- Step 1 – Find the Bias. First, find the bias of the fabric.
- Step 2 – Cut Strips. Cut strips along the 45-degree bias double the width of your bias maker.
- Step 3 – Join the Strips. Take 2 strips that have ends pointing in the same direction.
- Step 4 – Press Open and Trim Seams.